
Student IT Log-In Guide
This page provides a guide for students setting up your College IT account to use with Microsoft 365 email, College Wifi (also known as Eduroam) and the College’s Virtual Learning Environment, Canvas.
What you need to know:
Please wait a full 24 hours after enrolling on your course before setting up your college IT account.
You will know that you have been enrolled when you are given a student ID.
If you applied or enrolled through the college website you will find your student reference number listed there. It should also be on any email correspondence you've received from the college.
If you are still unsure of your reference number please contact student records on 0141 375 5196.
Is my account already set up?
You can check you have completed your College account setup properly by visiting our Account Checker online:

Step by Step Guide to Logging into Your College IT Account
You can set up your college IT account from home if you have access to a browser and a separate smartphone.
If you are setting up your account in College you can use any college PC, Thin Client or Mac to complete the full setup of your account.
Don’t start the process on just a smartphone as you’ll need to follow a QR code along the way.
Setting up your account at home
Open https://www.office.com in a web browser on your computer and select 'sign-in' on the page (also available in the top right hand corner).
Setting up your account in college
You can complete the account setup using any of the College’s PCs, Macs or Thin Clients.
1. Login using your email which is: studentnumber@cityofglacol.ac.uk

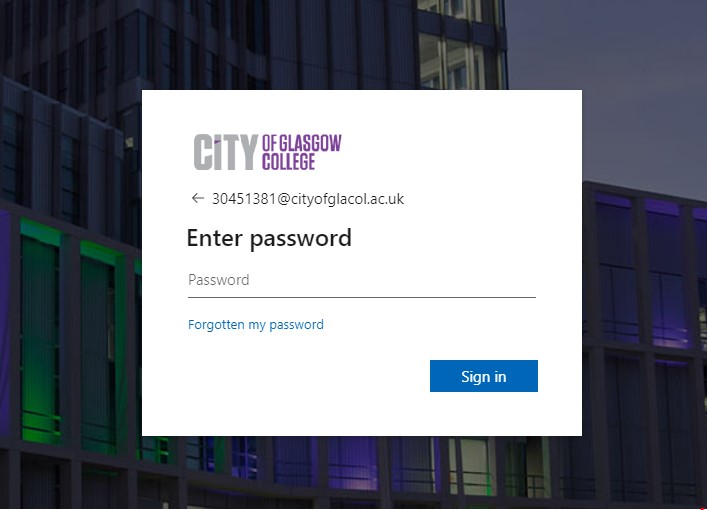
For example, if your student number is 12345678 and your date of birth is 21/07/01, your login details would be:
Username: 12345678@cityofglacol.ac.uk
Default initial password: City210701
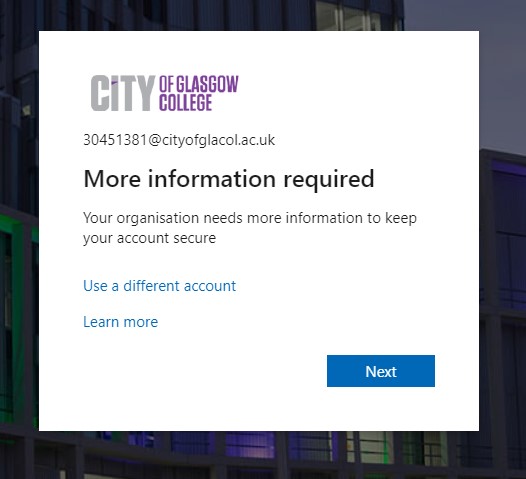
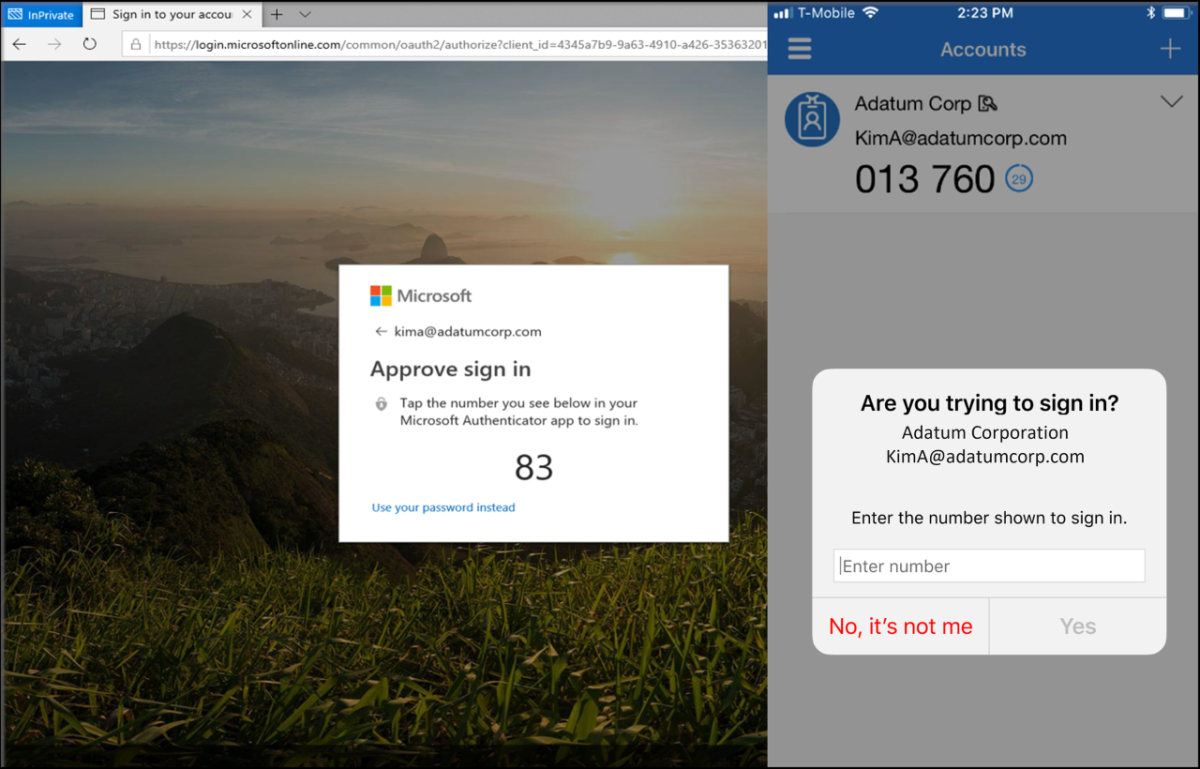
Click ‘Next’ to continue where you will be prompted to set up Multi-Factor Authentication (MFA).
MFA requires an additional method to confirm your identity. This can be by using the Microsoft Authenticator app, receiving a WhatsApp or SMS text message or by phone call. Skip to section 5 if you want to verify by WhatsApp, SMS text or phone call.
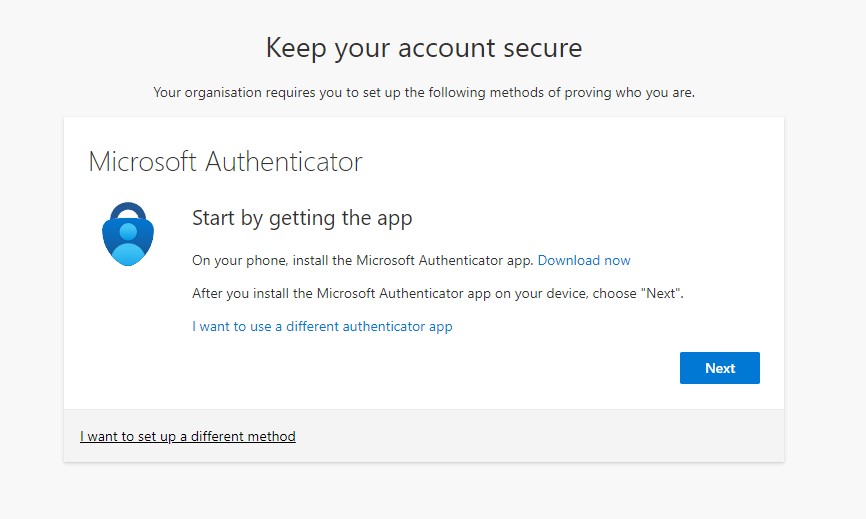
You can download the Microsoft Authenticator App either from Google Play or AppStore for iOS using the QR codes below.
iPhone

Android

Follow the on-screen instructions to set up the Microsoft Authenticator App. Please do not delete the app during your time at college. You may be prompted for MFA when signing into your accounts and services at any point in time.
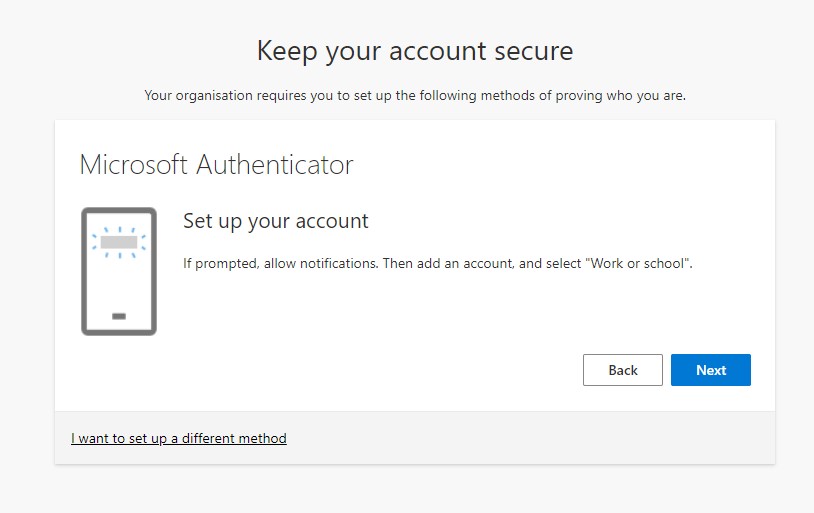
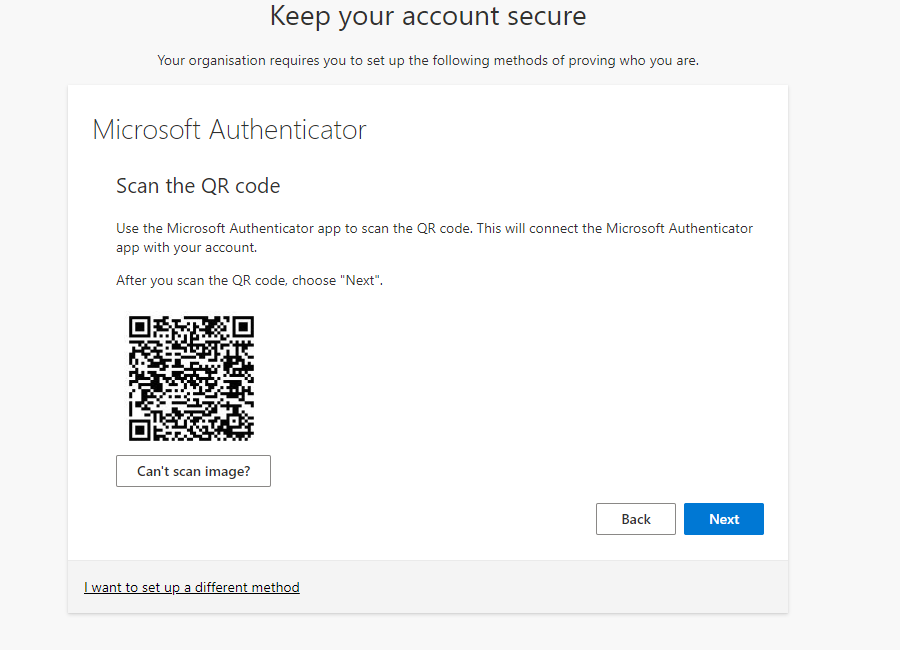
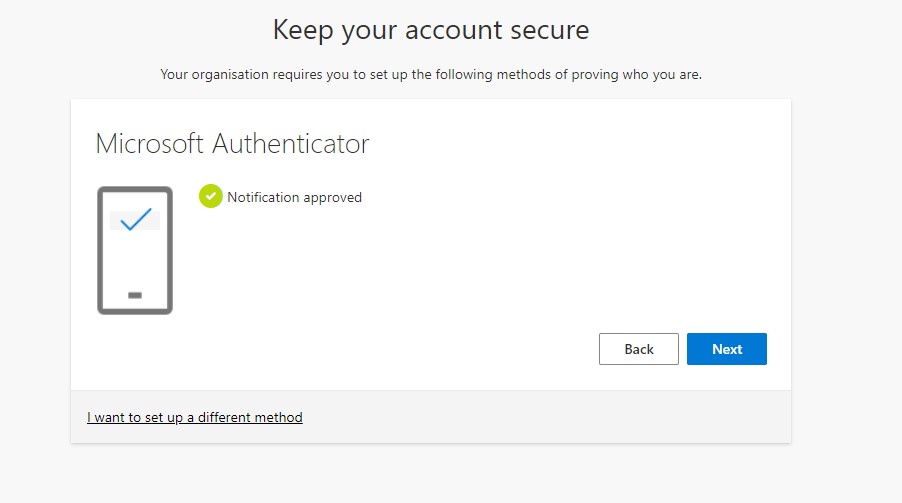
After clicking ‘Next’, it will prompt you to do a test of the application.
If setup has been successful, a message will be shown with a green tick, which means MFA was configured properly. Click ‘Next’ to continue.
Return to your initial browser window or login screen where you started. You will be prompted to change your initial default password (CityDDMMYY) and choose a new password for yourself.
This password should be unique and not used for other purposes or websites. Good passwords contain a combination of uppercase and lowercase letters, numbers or symbols but should be memorable.
If you attempt to use a commonly used password, it may ask you to try again.
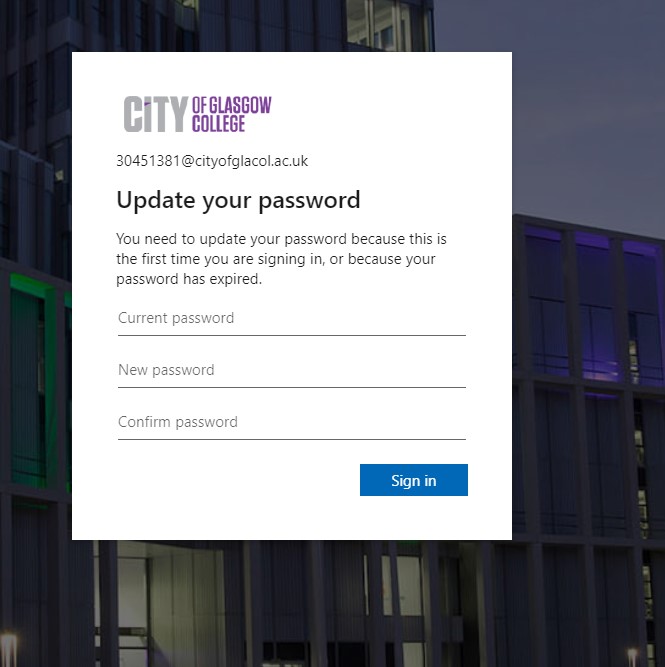
If your password choice was accepted and everything is completed successfully, your new password will be set. Use this password moving forward.
You can now use your College IT account and password to access IT services at College and home. Please now visit CityLife your student intranet, where you'll find lots of useful information about studying at City and links to important college systems and support services.
When you sign in to College services from home or your personal devices, you may be prompted for your MFA code via the Authenticator app or text message.
Further Information
You can check you have completed your College account setup by visiting our new Account Checker.
If you need help or support please contact the IT Service Desk